
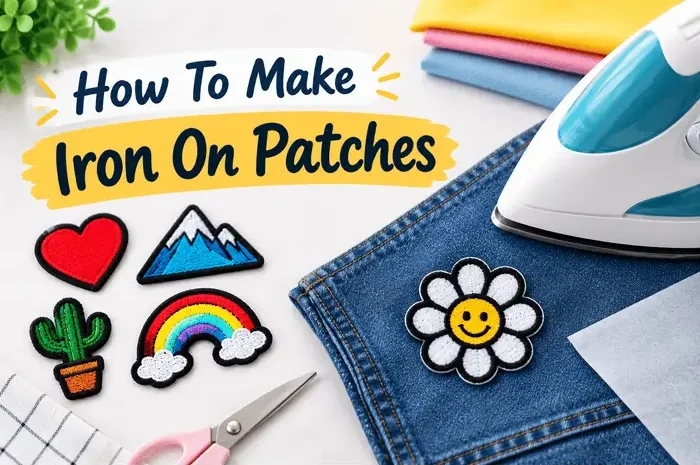
How To Make Iron On Patches
Knowing how to make iron on patches can change a plain jacket or a tired old bag in one afternoon. A piece of fabric, some heat-activated backing and an iron are all it takes to get started.
Maybe you want a small shape for a denim pocket or your initials on a school bag. Those are easy to make at home. Chenille letters are another matter. That soft thick pile is made on specialist machines, so it is usually something you order. We will look at both, starting with what an iron-on patch actually is.
What Are Iron-On Patches?
Before you learn how to use iron on patches, it helps to know what one is. An iron-on patch has a layer of heat-activated adhesive on the back, usually a shiny, slightly rough coating. An iron melts it and it grips the garment fibres as it cools.
- Iron-on: bonds with heat, so no needle is needed.
- Sew-on: has a plain fabric or felt back and is stitched around the edge.
Simple fabric or felt designs are easy to make at home. Embroidered and chenille patches come from manufacturers with either backing. Next, we cover how to use iron on patches, whether you make them or buy them.
What You Need To Make Iron-On Patches
Most of this is already in a craft drawer or a kitchen cupboard.
- Fabric: cotton, denim or felt. Felt is the easiest because the edges do not fray when cut.
- Fusible web: the adhesive sheet that goes on the back. Paper-backed sheets let you trace the shape first.
- Fabric scissors: sharp ones give clean edges. Cutting paper with them dulls the blade.
- An iron: any household iron works as long as it can run dry.
- A pressing cloth: a tea towel or thin pillowcase protects the patch from direct heat.
Keep nylon and similar synthetic fabrics for another project, since the heat can melt them.
How To Make Iron-On Patches At Home
Three methods work well at home. Choose by how detailed the design is and how much time you have.
| Method | Best for | Skill level |
| Printable transfer paper | Detailed images and logos | Beginner |
| Hand embroidery | Lettering and simple shapes | Some practice |
| Fabric or felt cut-outs | Bold shapes | Beginner |
Printable Transfer Paper
Print the design on transfer paper with an inkjet printer. If it has text, flip the image first or the letters will come out backwards. Cut around it with a thin border and iron it onto a cotton base.
Hand Embroidery
Sketch the design on cotton in pencil and hold the fabric tight in a hoop. Thick block letters and simple outlines suit hand stitching best. Fine detail is harder to keep neat.
Fabric Or Felt Cut-Outs
Cut each shape from felt and layer them, such as a circle with a smaller star on top. Felt does not fray so the edges need no finishing. A little fabric glue keeps the layers in place.
Once the design is finished, iron fusible web onto the back and trim around the shape. That backing turns any of these into an iron-on patch. It is the one step that stays the same in how to make iron on patches, no matter which design you pick.
How To Iron On A Patch
Most iron on patches instructions come down to heat, pressure and time. This order suits a cotton or denim garment.
- Read the care label first. It shows the heat setting the fabric can take.
- Set the iron to the cotton setting and turn the steam off. Moisture gets in the way of the adhesive.
- Press the spot where the patch will sit so the fabric is flat and dry.
- Place the patch and lay a tea towel or thin pillowcase over it.
- Press down firmly for about 30 seconds. Lean on the iron instead of sliding it around.
- Turn the garment inside out and press the back of the patch for another 30 seconds.
- Leave it until it is fully cool. The glue sets as it cools so moving it early can lift a corner.
Once cool, run a fingernail along the edges to check they are down.
If The Edges Lift
Cover the corner with the cloth and press again for 10 to 15 seconds. If it keeps lifting, add a few small stitches by hand at that spot.
How Long Do Iron-On Patches Last?
There is no fixed number. A patch lasts as long as its quality, the fabric underneath, the way it was pressed on and the way the garment is washed allow. A well-made patch on cotton or denim that was pressed on properly can stay put for a long time.
Washing is usually what wears a patch out. Turning the garment inside out, washing cool and letting it air dry instead of using the tumble dryer all take some of the strain off the adhesive. Thirty degrees is a common instruction on UK care labels so it is usually a safe place to start. Patches differ so keep the iron on patch instructions that came with yours and follow any wash advice on them. For a jacket or bag that gets worn and washed often, a few stitches around the edge will hold the patch long after the glue has softened.
Can You Make Chenille Patches At Home?
If you are looking into how to make chenille patches, the main thing to know is that it is a machine job. The soft, fuzzy surface comes from thick looped yarn stitched onto a felt base and a needle and a home iron cannot build that texture.
Why It Needs A Machine
Before any stitching starts, the design is digitised. That means it is turned into a file that tells the machine where each loop of yarn goes, which is why the letters on a varsity jacket look so even. The closest thing at home is hand embroidery but it comes out flat.
What To Decide Before Ordering
Suppliers usually ask for the same few details: the size, the colours, the lettering or logo and whether you want an iron-on or sew-on back. If the patch is going on a jacket, say so, because that can change the backing. Having these ready makes it quicker to order custom chenille patches.
How To Put Patches On Letterman Jacket
Sewing is the usual way. A letterman jacket normally has a wool body with leather or vinyl sleeves, and those materials do not always suit an iron. Stitching also keeps a thick patch lying flat.
Hold the patch in place with pins or tape. Tape is safer on leather, since pins leave holes. Then stitch around the edge with strong thread in a matching colour, going through the felt border and the jacket fabric.
In the UK this is often called a varsity jacket. If your chenille letter patches came with an iron-on back, check the supplier’s instructions and the jacket fabric before you reach for the iron.
FAQs
1- Do I need a special iron for iron-on patches?
No, the iron you already have is enough. Some irons drip a little water even with the steam switched off so tip out the tank before you start. Press on a table with a folded towel under the garment, since an ironing board is often too soft to give the patch firm pressure.
2- Is there a trick to making iron-on patches stick?
Two small habits help most. Press the back of the patch from inside the garment after pressing the front, then leave it until it is fully cool. The glue sets as it cools so checking the edges too early can break the bond.
3- What fabric is best for iron-on patches?
Cotton and denim hold them best because they cope with the heat and give the glue something to grip. Nylon, waterproof coated fabric and silk can melt or reject the adhesive so sewing is the safer choice for those.
4- What are the main types of patches?
Embroidered patches are stitched with thread and have a raised feel. Woven patches hold finer detail and small text. PVC patches are made from a moulded, rubber-like plastic and are waterproof. Chenille is the soft, fuzzy style seen on varsity jackets.
5- Can I design my own iron-on patches?
Yes. Simple designs can be made at home with fabric, transfer paper or hand embroidery. For thicker or more detailed styles you can send your artwork to a patch supplier, who will go through the border and backing options with you.
Make Simple Patches and Order the Rest
Simple flat designs are easy to make at home and this ‘iron on patches how to craft guide’ covers everything you need for them. Chenille and team lettering are different because they come from machines. A supplier can match a school or club design and offer a backing that suits the garment. If you are unsure which way to go, start with the design and the jacket or bag it is going on.